First of all, what is a "hero image"? In web design, a hero image is the name given to the large banner image, typically front and center on a website's homepage. The hero image is often the first visual element a visitor encounters on your site. Sometimes this could be a slideshow of images instead of just one. This blog post will cover how to edit both options.
Why would you change these? You may not. But for example, if you own an online store you may want to advertise seasonal sales or showcase new merchandise. An interior designer or a photographer may want to display their most recent project's professional images.

To get started log into your Wix account and head to your editor. Instructions for those steps can be found here: Getting started with the Wix website editor. Once there, your hero image will likely be one of the top strips on your screen. Click that strip. A small menu appears with a "Change strip background" button. Click that and the Strip Background menu will open, as seen below.

Wix gives you the option to fill the strip with either a solid color, an image or a video. For this example we are going to stick with an image. Click "Image", circled in red in the screenshot above. Here you have the option to use your own images that you've uploaded. (Wix advises that background images be 3000 X 3000 pixels.) You can also choose from a huge selection of Free From Wix images, or select a Shutterstock Image for $2.99. Once you've selected your image, click Change Background.

Immediately the new image will load into your strip, as seen below. From here if you click the strip again > Change Strip Background > Settings, and there are a number of options for how this new image is displayed on your website.


Under Image Settings you can:
- add a color underlay, like the blue one in my example. To do this select a "Color behind image" then lower the Image Opacity.
- add Scroll Effects - to see what these look like, select one, then click the "Preview" button (top right corner of your screen). The effects won't be displayed in the editor.
- Adjust the scaling and positioning of the image. These changes will occur immediately so you can see what happens if you decide to play with them.
CHANGING SLIDE SHOW IMAGES
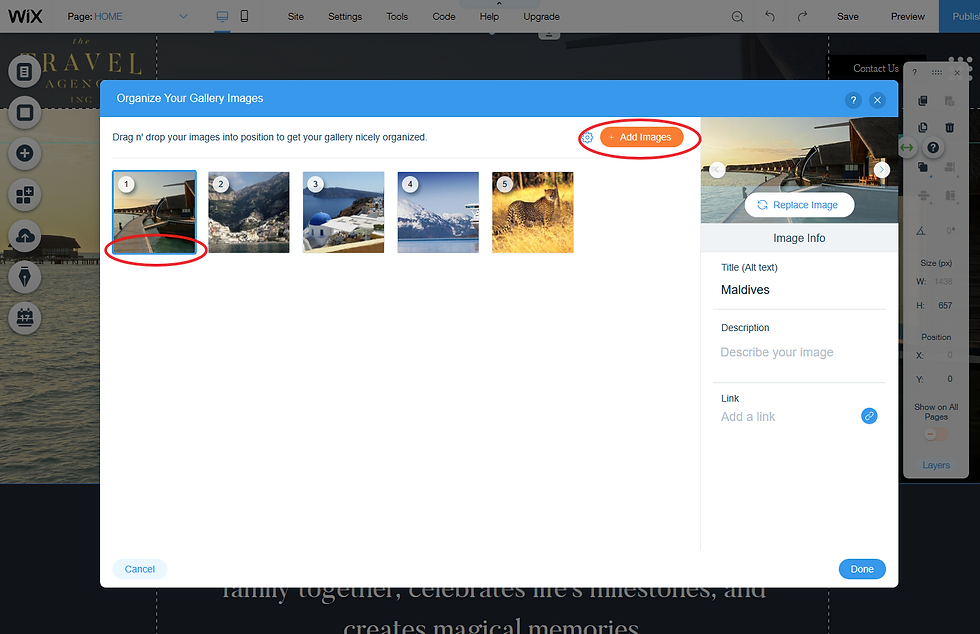
Click the strip that contains your slide show to see the menu circled in red in the example below. > click "Change Images"


A window will open displaying all the images currently in your slideshow.
To delete: hover over any image, a trash can icon will appear in the area I have circled. Click the trash can and Wix will ask if you are sure you want to delete that image. *Note: This only deletes the image from your slideshow. It can still be found in your Image Uploads folder.
To add: Click Add Images. From there you will have the option to use your own images, Free Wix images or Shutterstock images.
QUICK REMINDERS:
- If you are creating your own images for a strip background, Wix recommends a size of 3000 X 3000 pixels. File types supported are: JPG, PNG and GIF.
- Always remember to click over to the Mobile editor to make sure your new images will appear correctly on a mobile device.
- When you are ready for the world to see your changes click Publish!
As always, if any questions arise I am happy to help. You can contact me here.
* All the websites used in screenshot examples are unpublished copies of custom sites designed by Charlie & Ava Designs

Changing the homepage hero image or slideshow roman senate images on a website typically involves making edits to the website's code or content management system (CMS). The specific steps may vary depending on the CMS or website builder you are using